
With version 5.2.0 cypress officially started supporting shadow dom. You have to use the command .shadow(selector) to traverse into the shadow DOM of an element. Lets further deep dive by automating the below scenario:
1. Open https://books-pwakit.appspot.com/
2. Traverse through the shadow DOM and reach the input box
3. Write the keyword ‘Science’ and click to search
4. Validate that the URL contains ‘explore?q=Science’
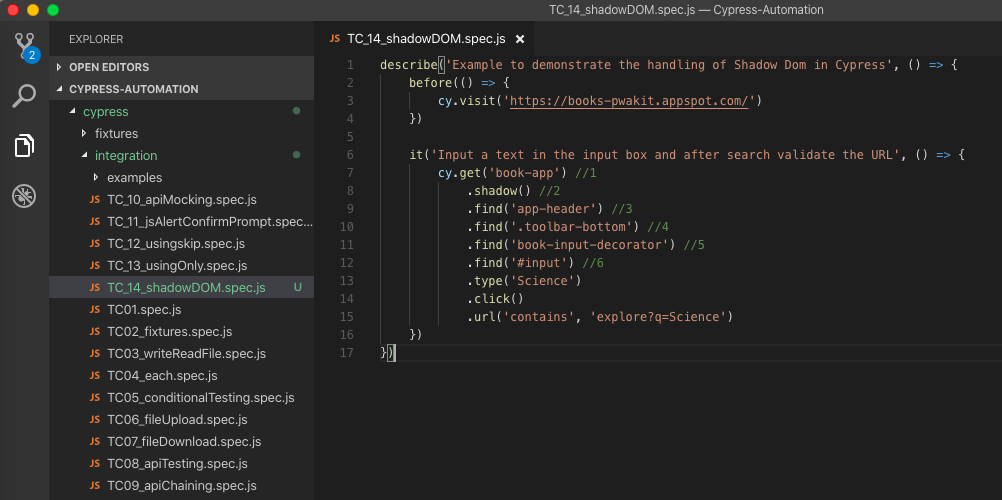
Method 1: Using the shadow() command.
Step 1:
1 2 3 4 5 6 7 8 9 10 11 12 13 14 15 16 17 | describe('Example to demonstrate the handling of Shadow Dom in Cypress', () => { before(() => { cy.visit('https://books-pwakit.appspot.com/') }) it('Input a text in the input box and after search validate the URL', () => { cy.get('book-app') //1 .shadow() //2 .find('app-header') //3 .find('.toolbar-bottom') //4 .find('book-input-decorator') //5 .find('#input') //6 .type('Science') .click() .url('contains', 'explore?q=Science') }) }) |
Let’s try to understand the script by looking into the Dom Structure:
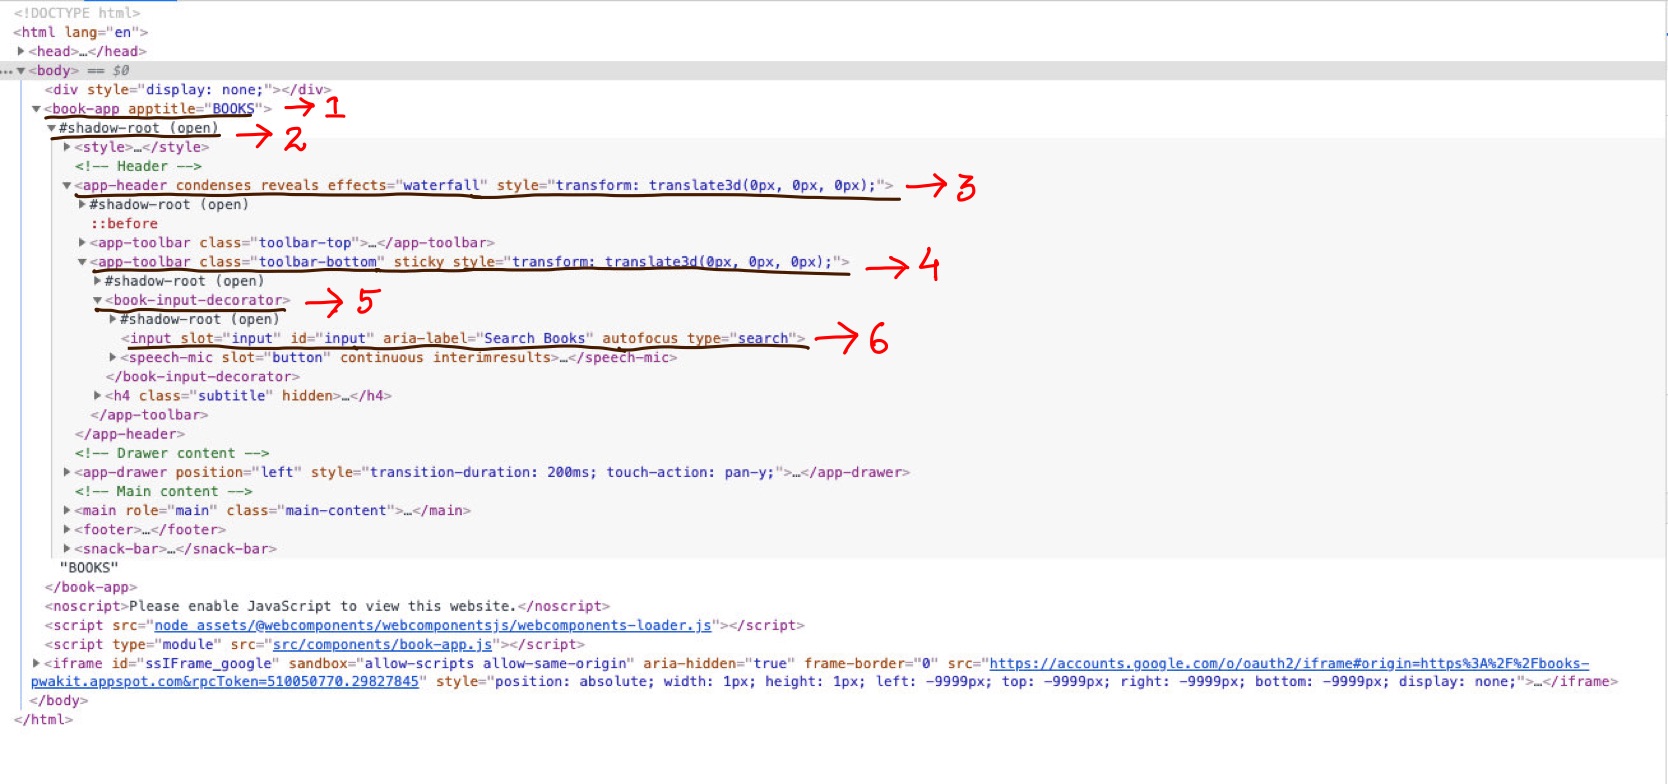
As you can see in the image to reach our input (//6) we have to traverse through multiple elements along with shadow dom. To go inside the shadow dom we have used .shadow(). Once we reached the input box, we typed the keyword ‘Science’ and clicked to simulate the search. Then we finally validated that the URL contained the keyword science by writing .url(‘contains’, ‘explore?q=Science’)
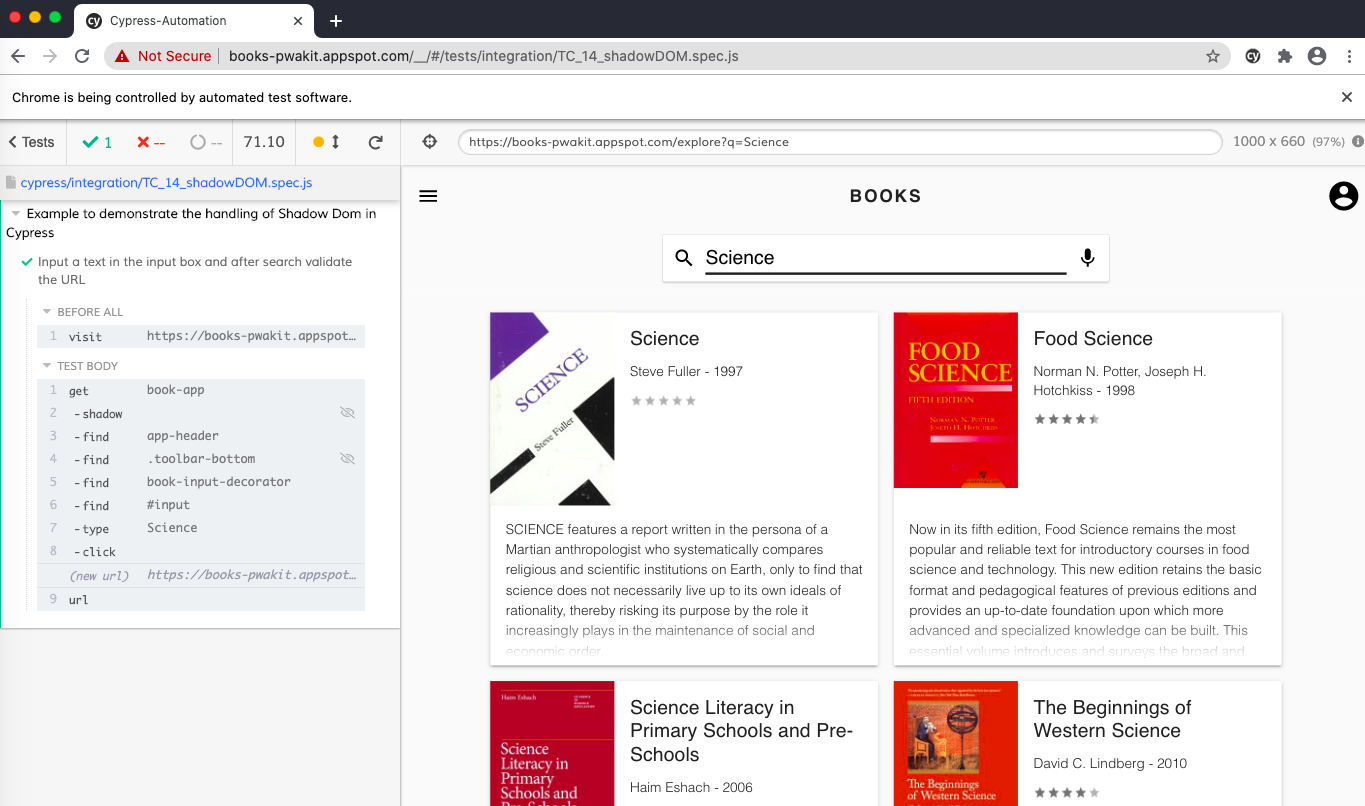
Step 2: After successful execution:
Update – 23 Oct 2021: I had written this article around a year back and since then a lot has changed in cypress. Now there are two better and cleaner ways to deal with shadow dom. Let’s look into them one by one.
Method 2: Using the includeShadowDom flag. Add includeShadowDom: true to your cypress.json file.

Now, The above code can be condensed to:
1 2 3 4 5 6 7 | it('Input a text in the input box and after search validate the URL with includeShadowDom flag set to true', () => { cy.get('book-app') .find('#input') .type('Science', { force: true }) .click() .url('include', 'explore?q=Science') }) |
With the includeShadowDom flag set to true, the get and find commands will automatically traverse through Shadow DOM if they find any. Also, now we can directly go to our intended element inside the Shadow DOM, instead of traversing through the elements level by level as done in Method 1. Then, once we have found the element, we are typing the text ‘Science’. After that, we are using the click() command on the same input field where we have typed to trigger the search. And then finally we are asserting that the URL has the text explore?q=Science. In method 1, I noticed that the type command was failing sometimes, mostly because of some elements not loading, or due to some unfinished animations. So to prevent that from happening we have used the options object force: true with type.
Method 3: Using includeShadowDom with get or find commands. Here instead of globally passing the includeShadowDom flag, we can also add them to specific commands as well, as options. With this, our above test would look like:
1 2 3 4 5 6 7 | it('Input a text in the input box and after search validate the URL with includeShadowDom option', () => { cy.get('book-app') .find('#input', { includeShadowDom: true }) .type('Science', { force: true }) .click() .url('include', 'explore?q=Science') }) |
Like above, here also we are typing the keyword ‘Science’ into our input field, then using the click() command we are triggering the search, and then finally asserting that the URL has the text explore?q=Science.
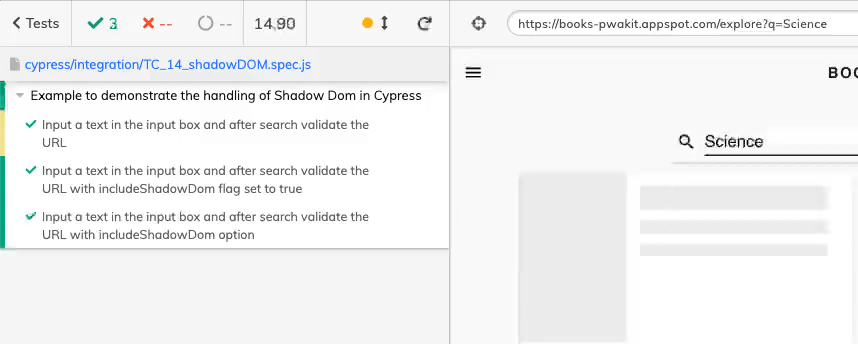
Let’s execute all the above 3 tests together.
Do check out 🙂
Github: https://github.com/alapanme/Cypress-Automation
All Cypress Articles: https://testersdock.com/cypress-tutorial/


Hi, Thanks for Nice article. Can you please share web- site link where I can test Shadow dom using cypress.
Link given here not working
Hey, This url https://books-pwakit.appspot.com/ is working for me. You can also test shadow DOM here https://the-internet.herokuapp.com/shadowdom