In this article, we will write two simple tests for login.
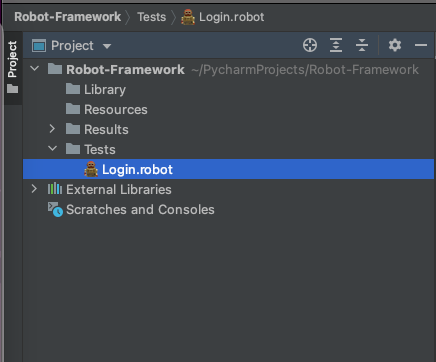
Step 1: Create a file under ‘Tests’ folder with .robot extension. The .robot files are considered as Test Suites by Robot Framework.
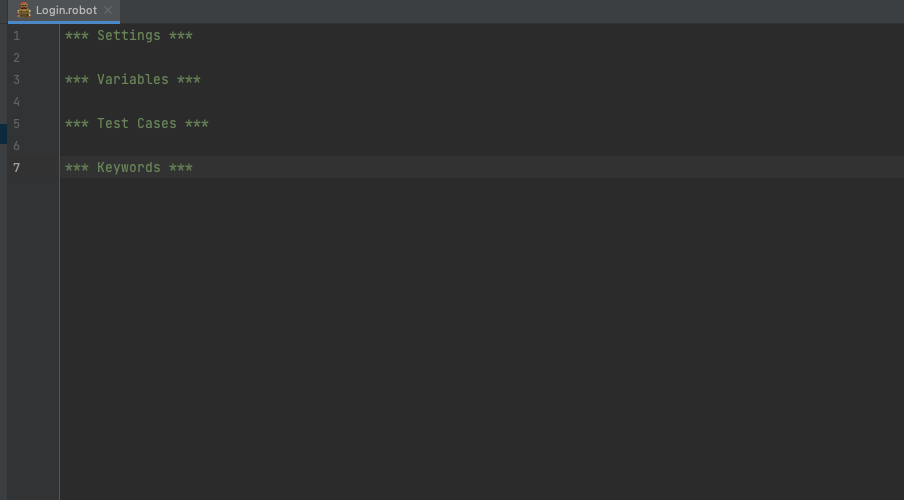
Step 2: Now a robot file contains 4 sections.
*** Settings *** – Used for Importing test libraries, resource files and variable files.
*** Variables *** – Used for defining variables that can be used elsewhere in the test.
*** Test Cases *** – Used for writing our tests.
*** Keywords *** – Used for creating custom keywords from existing lower-level keywords.
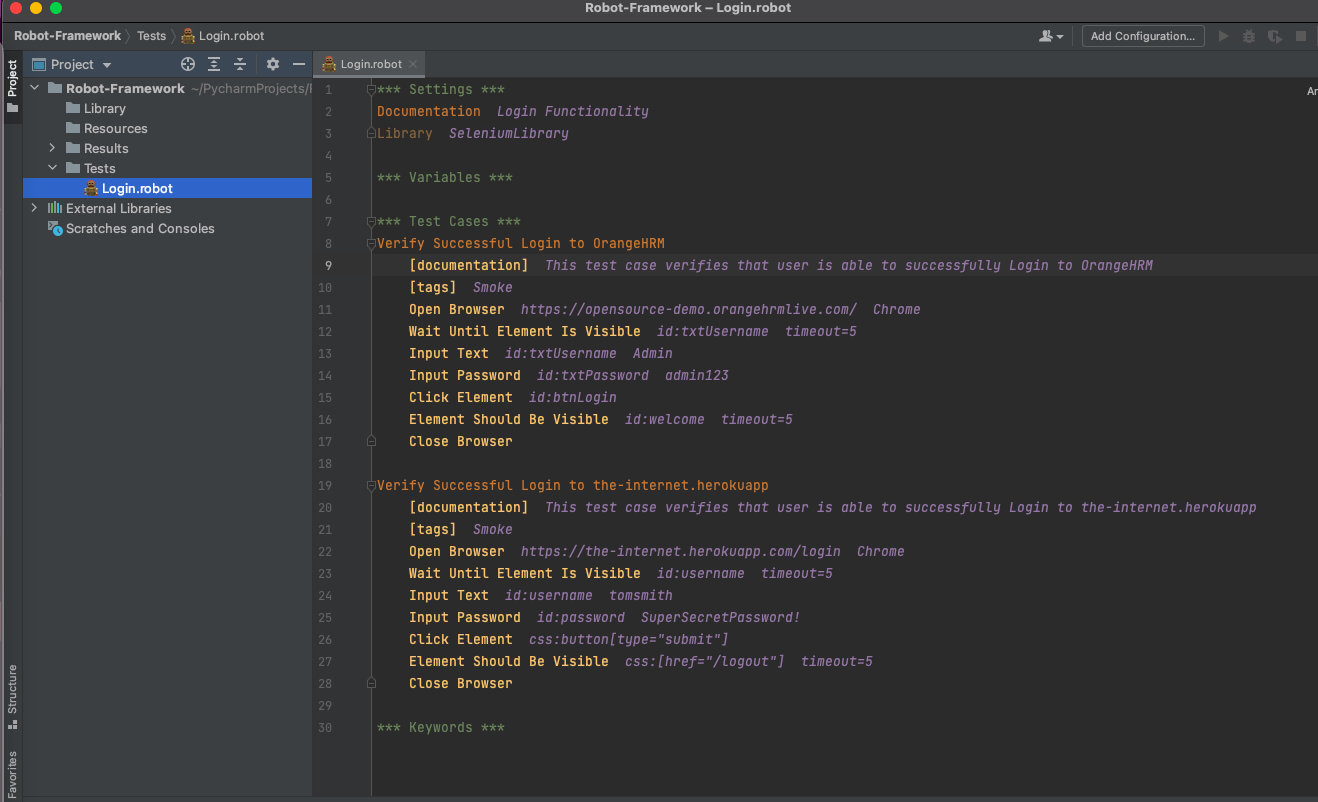
Step 3: Now we will write our tests.
1 2 3 4 5 6 7 8 9 10 11 12 13 14 15 16 17 18 19 20 21 22 23 24 25 26 27 28 29 30 | *** Settings *** Documentation Login Functionality Library SeleniumLibrary *** Variables *** *** Test Cases *** Verify Successful Login to OrangeHRM [documentation] This test case verifies that user is able to successfully Login to OrangeHRM [tags] Smoke Open Browser https://opensource-demo.orangehrmlive.com/ Chrome Wait Until Element Is Visible id:txtUsername timeout=5 Input Text id:txtUsername Admin Input Password id:txtPassword admin123 Click Element id:btnLogin Element Should Be Visible id:welcome timeout=5 Close Browser Verify Successful Login to the-internet.herokuapp [documentation] This test case verifies that user is able to successfully Login to the-internet.herokuapp [tags] Smoke Open Browser https://the-internet.herokuapp.com/login Chrome Wait Until Element Is Visible id:username timeout=5 Input Text id:username tomsmith Input Password id:password SuperSecretPassword! Click Element css:button[type="submit"] Element Should Be Visible css:[href="/logout"] timeout=5 Close Browser *** Keywords *** |
Let’s understand step by step what we are doing here. We have written two test cases, which perform Login operations on two different websites. And since we are using Selenium Library, we will be referring the Selenium Library Docs to get the commands used in our tests. One thing to remember is that between two words there should always be a gap of 2 spaces.
1 2 3 | *** Settings *** Documentation Login Functionality Library SeleniumLibrary |
1. Documentation – These Texts are are added to the HTML reports to make them more descriptive.
2. Library SeleniumLibrary – This imports the selenium library into our test, so that we can use the selenium commands.
1 2 3 4 5 6 7 8 9 10 11 12 13 14 15 16 17 18 19 20 21 22 | *** Test Cases *** Verify Successful Login to OrangeHRM [documentation] This test case verifies that user is able to successfully Login to OrangeHRM [tags] Smoke Open Browser https://opensource-demo.orangehrmlive.com/ Chrome Wait Until Element Is Visible id:txtUsername timeout=5 Input Text id:txtUsername Admin Input Password id:txtPassword admin123 Click Element id:btnLogin Element Should Be Visible id:welcome timeout=5 Close Browser Verify Successful Login to the-internet.herokuapp [documentation] This test case verifies that user is able to successfully Login to the-internet.herokuapp [tags] Smoke Open Browser https://the-internet.herokuapp.com/login Chrome Wait Until Element Is Visible id:username timeout=5 Input Text id:username tomsmith Input Password id:password SuperSecretPassword! Click Element css:button[type="submit"] Element Should Be Visible css:[href="/logout"] timeout=5 Close Browser |
1. Verify Successful Login to OrangeHRM/Verify Successful Login to the-internet.herokuapp are the test case names.
2. [documentation] – Provides more info regarding the test cases. Also they are added to the HTML reports.
3. [tags] Smoke – Adds tags to the tests.
4. Open Browser https://the-internet.herokuapp.com/login Chrome – Opens the URL in chrome browser.
5. Wait Until Element Is Visible id:txtUsername timeout=5 Will wait until the element is visible on the page with a timeout of 5 seconds.
6. Input Text id:username tomsmith – Inputs the text ‘tomsmith’ in the username input field.
7. Input Password id:txtPassword admin123 – Inputs the text into the password field. The difference between Input text and Input password is that, Input password masks the password text in the generated reports.
8. Click Element css:button[type=”submit”] – Clicks the element.
9. Element Should Be Visible id:welcome timeout=5 – Verifies that the element identified by the locator is visible with a timeout of 5 seconds.
10. Close Browser – Closes the current browser.
Step 4: To execute the tests we will use the command:
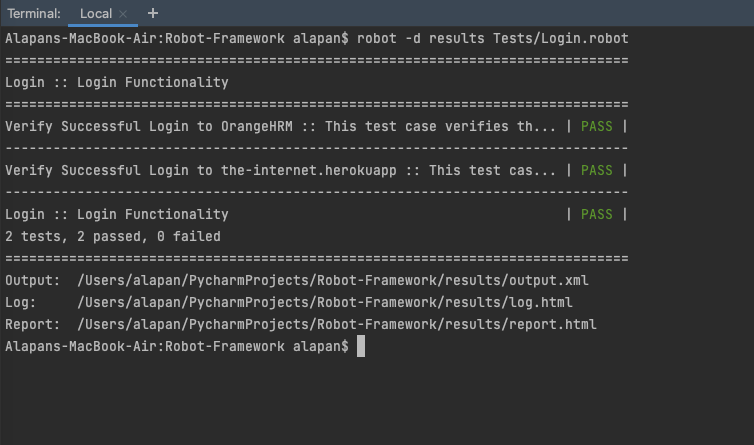
1 | robot -d results Tests/Login.robot |
-d results will save the reports in the results folder. robot keyword is used to execute the robot framework tests. After a successful execution, the terminal should look like:
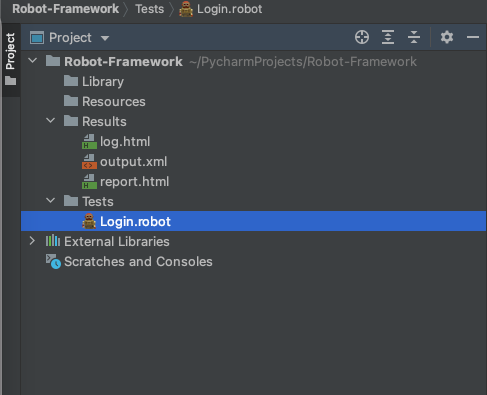
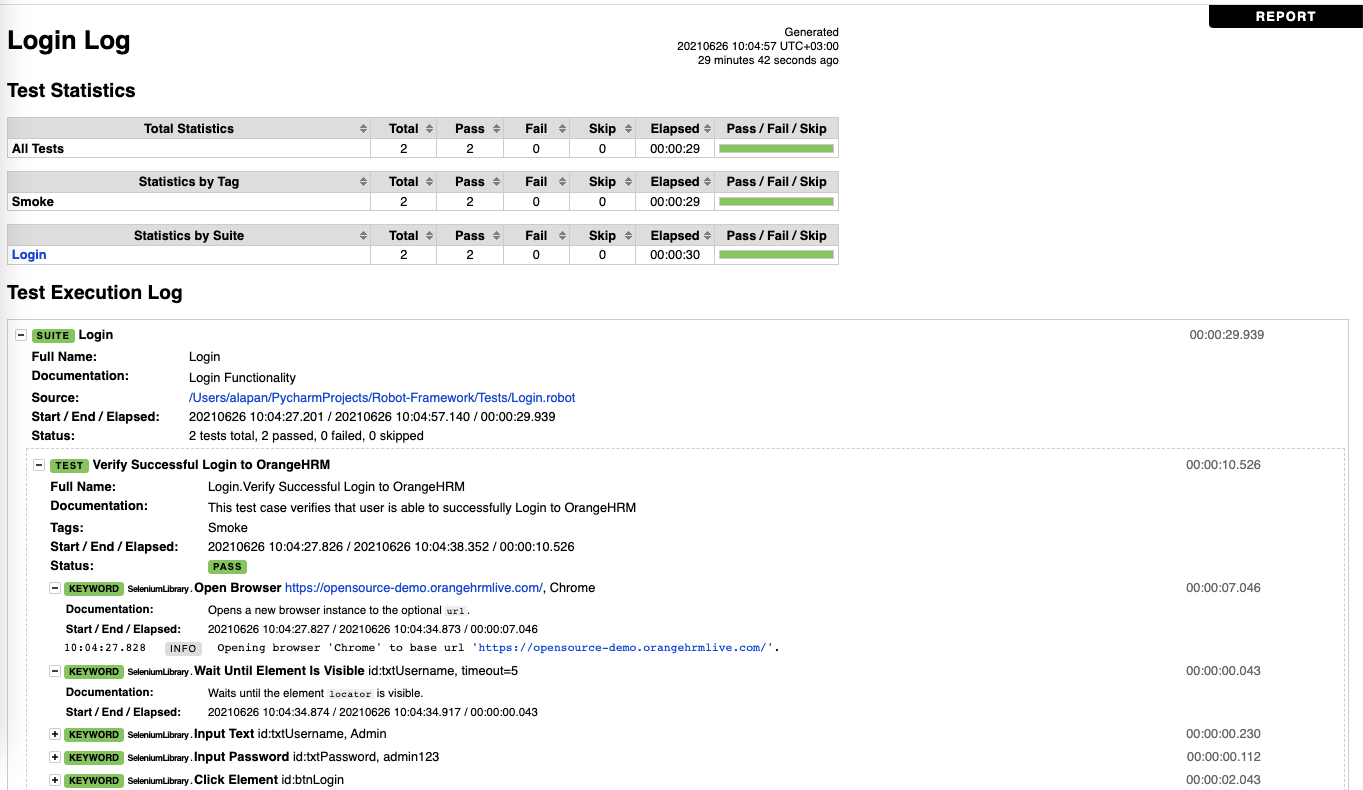
Step 5: Robot Framework creates beautiful and very detailed HTML reports after every execution. I think this is the most impressive feature of this framework. Go to ‘Results’ folder after execution and you could see three files – log.html, output.xml and report.html
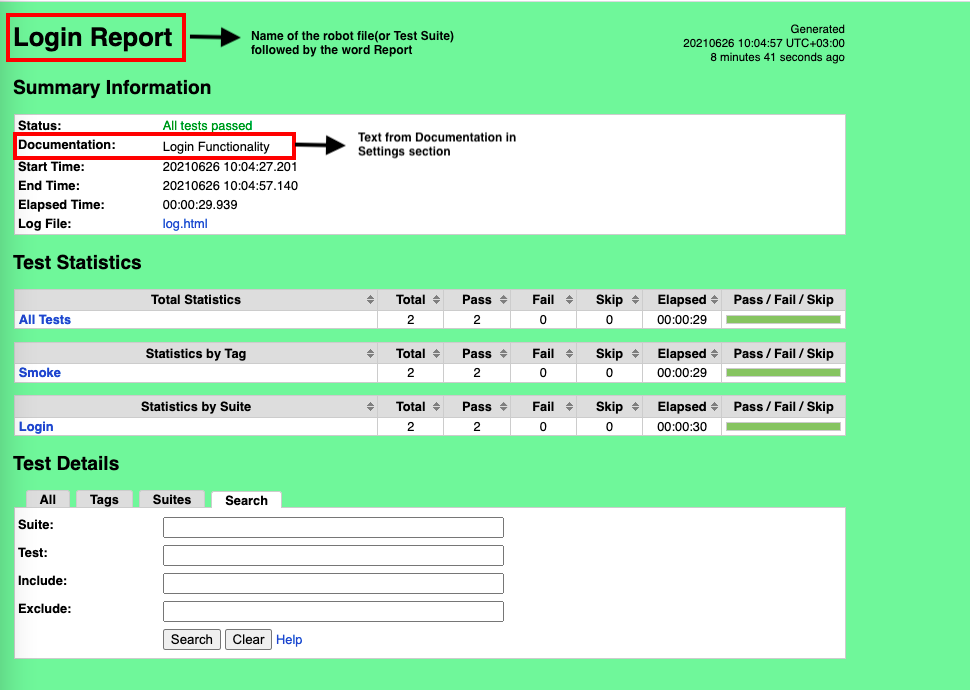
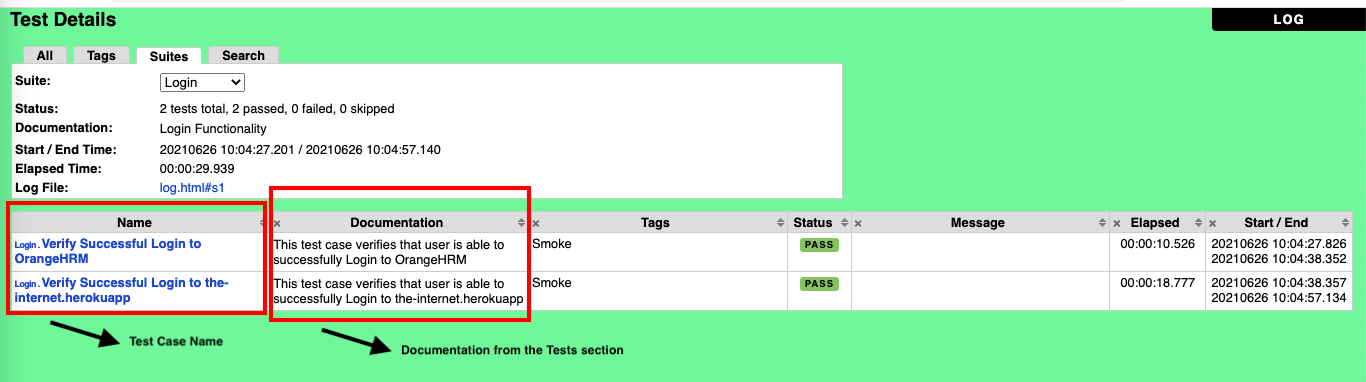
report.html:
log.html:
Do check out 🙂
Github: https://github.com/alapanme/Robot-Framework
All Robot Framework Articles: https://testersdock.com/robot-framework-tutorial/


Wonderful Job!