
In this article, we will look into the folder structure for Robot Framework. Basically, you need to create 4 folders:
1. Library – This will be used for storing the custom libraries.
2. Resources – Resources folder will be used to write reusable codes. It would be mostly used for implementing our Page Object structure.
3. Results – This directory will be used for saving the Test execution logs and results.
4. Tests – This will be used to write our Robot Tests.
To create a directory(or folder) in PyCharm, Right Click on the Project Folder > New > Directory > Provide the name of the directory > Press ENTER.
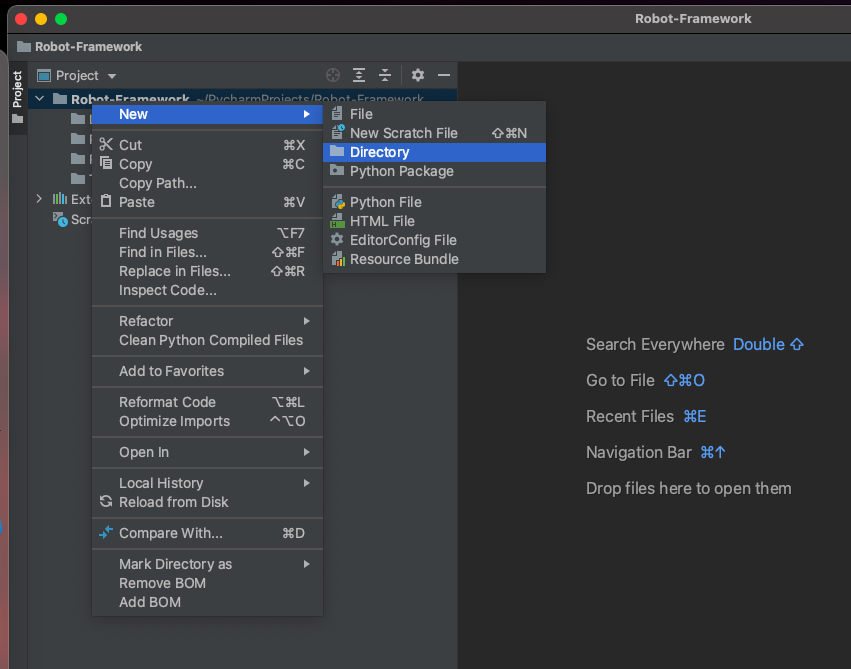
Once all the directories are created your Project should look something like this:

You can further extend the above folder structure by creating sub-folders to further abstract depending on the project requirements. For Example, if your project has multiple products then you can create subfolders inside the ‘Tests’ folder as ‘Product 1’ and ‘Product 2’ and then write the tests for each product inside their corresponding folders. Or, If you want to group your tests by Functional or UI or something else, you can create corresponding folders inside the ‘Tests’ folder. Or, If you want to keep your test data in a separate folder, you can create a ‘Test Data’ folder inside the ‘Resources’ folder and so on.
Do check out 🙂
Github: https://github.com/alapanme/Robot-Framework
All Robot Framework Articles: https://testersdock.com/robot-framework-tutorial/


Hallo Alapan,
There tutorials are neat and easy to understand , thank you so much.
As i am new to RF, these are helping me very much.
In the github link, Results folder is missing? Is my observation correct?
The results folder is added to gitignore. When you create the report, the results folder will be created automatically.