In this article, we will see in detail how we can install Robot Framework and all the other necessary libraries on a MAC machine.
Step 1: Install Python
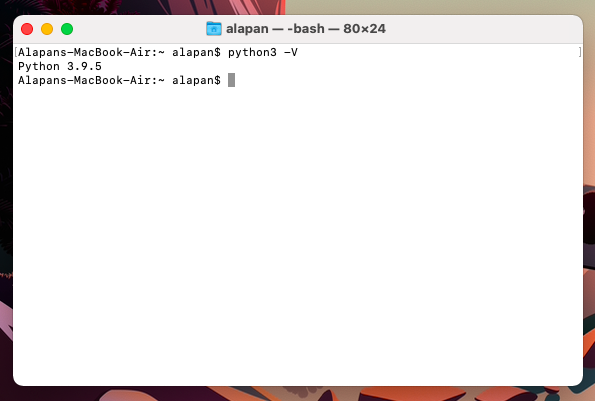
Go to https://www.python.org/downloads/ and download the latest .pkg file. Run the installer and complete the installation. Once python is installed, go to terminal and run the command python3 -V and it should display the python version.
Step 2: Install PIP
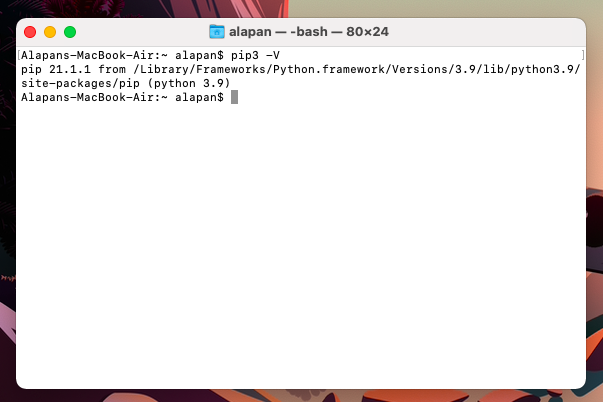
Pip is a package manager for python. It is installed by default when running Step 1. To check the pip version run the command pip3 -V.
Step 3: Check that the path for python and pip is added to the .bash_profile, if not add it manually
Run the command vi .bash_profile and if you have installed python through the installer (in Step 1) you should see the path automatically added.

In case you don’t have the .bash_profile, create one using the touch command and add the path manually. Also if you have a .bash_profile file and the path for python was not added, add it manually.
1 2 | PATH="/Library/Frameworks/Python.framework/Versions/3.9/bin:${PATH}" export PATH |
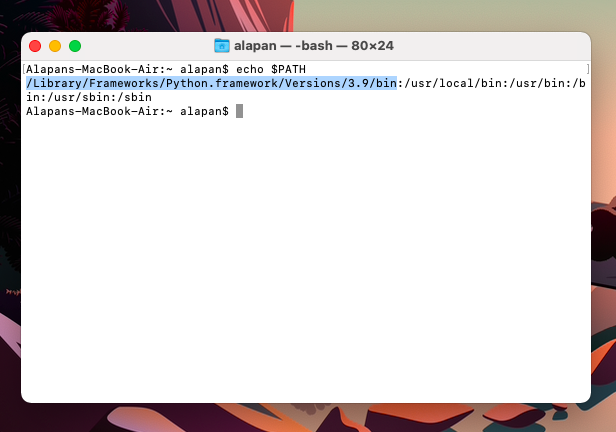
Once the path is successfully saved, run the command echo $PATH and it should display the python path.
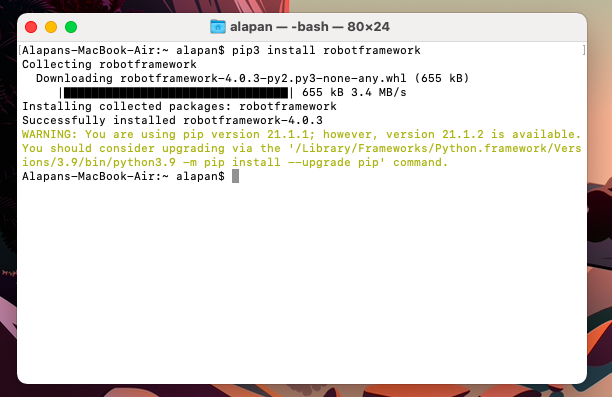
Step 4: Install Robot Framework
Run the command pip3 install robotframework.
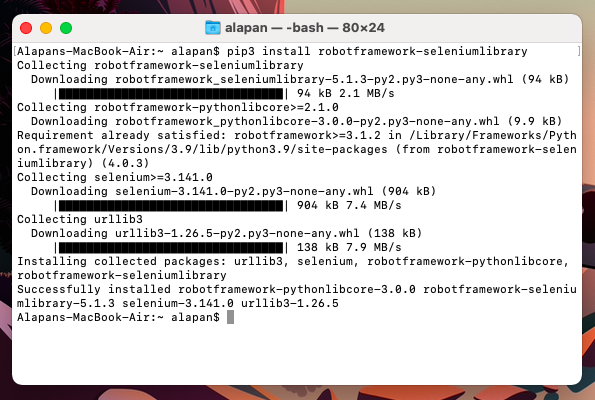
Step 5: Install Selenium Library
Run the command pip3 install robotframework-seleniumlibrary.
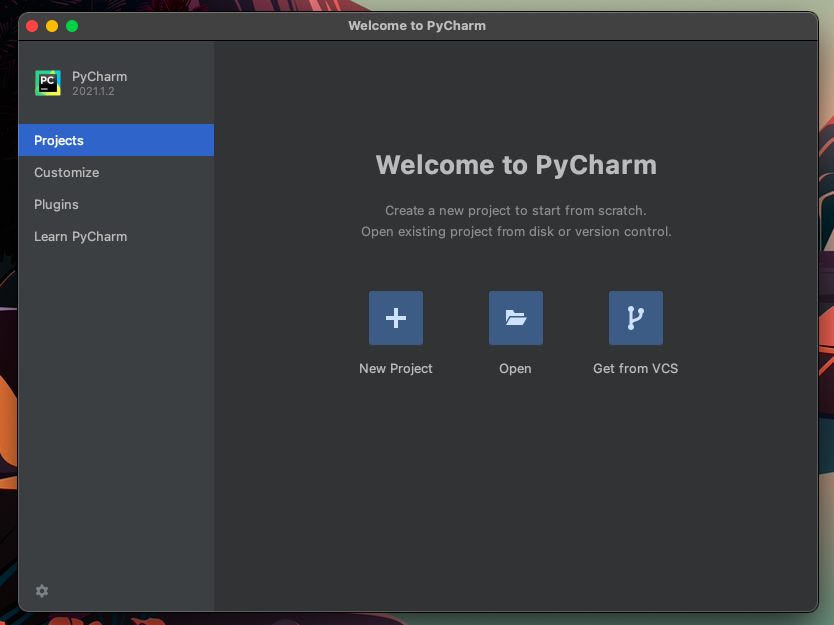
Step 6: Download and install PyCharm IDE community edition
Go to https://www.jetbrains.com/pycharm/download/#section=mac and download the .dmg file. Double click to open and install it.
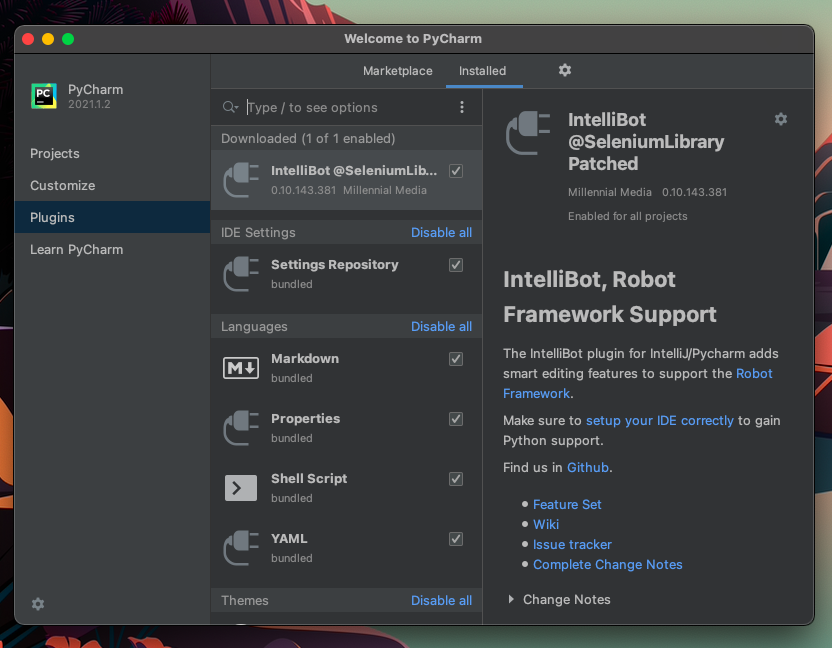
Step 7: Install IntelliBot @SeleniumLibrary Patched Plugin in PyCharm IDE
The IntelliBot plugin adds smart editing features to support the Robot Framework. Go to Plugins, Search and then install it.
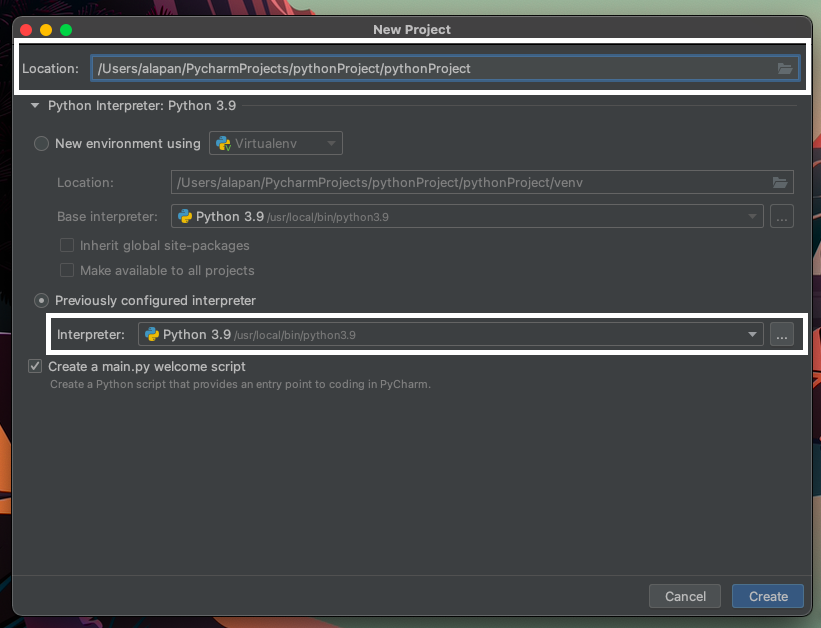
Step 8: Create a Project and set the interpreter
Click on ‘New Project’. Check the location of the project folder. Now go the ‘Previously configured Interpreter’ > ‘Three Dots Button’ > ‘System Interpreter’ > Select Python 3.9 from the dropdown. And then finally click on the ‘Create’ button.
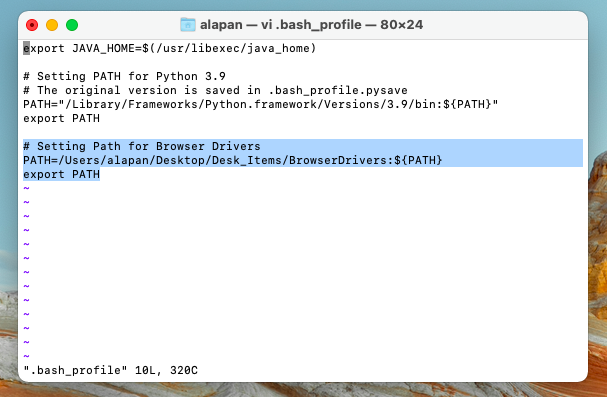
Step 9: Install Browser Drivers and update their paths in .bash_profile
For this example, we are only going to install the chromedriver. Go to https://chromedriver.chromium.org/downloads and download the latest chromedriver. And also make sure that the chrome version on your computer is updated to the latest version. Now place the driver file in a folder anywhere on your machine and add the path in the .bash_profile file.
To update .bash_profile file:
a) Run vi .bash_profile
b) Press i to edit the file
c) After adding the path, Press ESC key, then type :wq!, and then press the ENTER key
1 2 3 | # Setting Path for Browser Drivers PATH=/Users/alapan/Desktop/Desk_Items/BrowserDrivers:${PATH} export PATH |
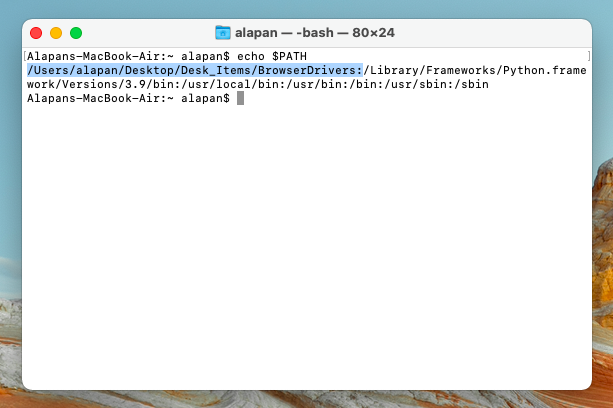
Once the path is set, run the command echo $PATH to cross verify.
Do check out 🙂
Github: https://github.com/alapanme/Robot-Framework
All Robot Framework Articles: https://testersdock.com/robot-framework-tutorial/


Thanks a lot it helped
Very helpful. Thanks a lot!