In this article, we will look in detail at how we can switch between browser windows or browser tabs in Robot framework. There are two ways to achieve this –
1. Using Locators – The locator can be used in the format strategy:value (recommended) or strategy=value. Supported strategies are name, title, and URL. These match windows using their name, title, or URL, respectively.
2. Using Window Handles – Returns all child window handles of the selected browser as a list. And then using the list we can switch to our relevant browser window.
Let’s write a simple test with the above two approaches:
1. Open the webpage https://the-internet.herokuapp.com/windows
2. Click on the ‘Click Here’ link to open a new browser window.
3. Switch to the previous browser window and validate the text – Opening a new window
4. Again Switch the next browser window and validate the text – New Window
1 2 3 4 5 6 7 8 9 10 11 12 13 14 15 16 17 18 19 20 21 22 23 24 25 26 27 28 29 30 31 32 33 34 35 | *** Settings *** Documentation Switching between Browser Windows in Robot Framework Library SeleniumLibrary *** Variables *** *** Test Cases *** Switch between Browser windows using 'Browser Title' and verify the text [documentation] This test case verifies that the user is able to switch between browser ... windows using browser title and verify the text. [tags] Smoke Open Browser https://the-internet.herokuapp.com/windows Chrome Wait Until Element Is Visible tag:h3 timeout=5 Click Element css:[href="/windows/new"] Switch Window title:The Internet Element Text Should Be tag:h3 Opening a new window timeout=5 Switch Window title:New Window Element Text Should Be tag:h3 New Window timeout=5 Close Browser Switch between Browser windows using 'Get Window Handles' and verify the text [documentation] This test case verifies that the user is able to switch between browser ... windows using window handles and verify the text. [tags] Smoke Open Browser https://the-internet.herokuapp.com/windows chrome Wait Until Element Is Visible tag:h3 timeout=5 Click Element css:[href="/windows/new"] ${handles}= Get Window Handles Switch Window ${handles}[0] Element Text Should Be tag:h3 Opening a new window timeout=5 Switch Window ${handles}[1] Element Text Should Be tag:h3 New Window timeout=5 Close Browser *** Keywords *** |
Using Locators:
1 2 3 4 5 6 7 8 9 10 11 12 | Switch between Browser windows using 'Browser Title' and verify the text [documentation] This test case verifies that the user is able to switch between browser ... windows using browser title and verify the text. [tags] Smoke Open Browser https://the-internet.herokuapp.com/windows Chrome Wait Until Element Is Visible tag:h3 timeout=5 Click Element css:[href="/windows/new"] Switch Window title:The Internet Element Text Should Be tag:h3 Opening a new window timeout=5 Switch Window title:New Window Element Text Should Be tag:h3 New Window timeout=5 Close Browser |
Firstly, we are opening the URL https://the-internet.herokuapp.com/windows in a chrome browser. Then we are waiting for the h3 element to be visible on the web page with a timeout of 5 seconds. After that, we are clicking the ‘Click Here’ link which opens a new browser window(or tab). Now using Switch Window title:The Internet we moving to the first tab. As the name suggests Switch Window switches to browser window matching locator and here the locator that we are using is title. Next, we are verifying the text Opening a new window on the current browser window. Now again using Switch Window title:New Window we are going to the next tab and verifying the text ‘New Window’ using Element Text Should Be tag:h3 New Window timeout=5. Then, finally, we are closing the browser and ending the test using Close Browser.
Using Window Handles:
1 2 3 4 5 6 7 8 9 10 11 12 13 | Switch between Browser windows using 'Get Window Handles' and verify the text [documentation] This test case verifies that the user is able to switch between browser ... windows using window handles and verify the text. [tags] Smoke Open Browser https://the-internet.herokuapp.com/windows chrome Wait Until Element Is Visible tag:h3 timeout=5 Click Element css:[href="/windows/new"] ${handles}= Get Window Handles Switch Window ${handles}[0] Element Text Should Be tag:h3 Opening a new window timeout=5 Switch Window ${handles}[1] Element Text Should Be tag:h3 New Window timeout=5 Close Browser |
Here also we are opening the URL https://the-internet.herokuapp.com/windows in a chrome browser. Then we are waiting for the h3 element to be visible on the web page with a timeout of 5 seconds. After that, we are clicking the ‘Click Here’ link which opens a new browser window(or tab). Now using ${handles}= Get Window Handles we are saving the list of available browser windows(which is 2 in our case) to our handles variable.
Now using Switch Window ${handles}[0] we go to the first browser window and validate the text ‘Opening a new window’ using Element Text Should Be tag:h3 Opening a new window timeout=5. And then again using Switch Window ${handles}[1] we go to the second browser window and validate the text ‘New Window’ using Element Text Should Be tag:h3 New Window timeout=5. Then, finally, we are closing the browser and ending the test using Close Browser.
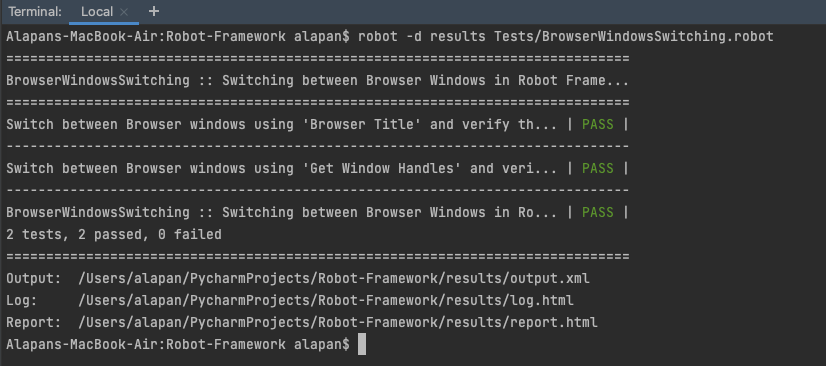
After Successful Execution, the terminal should look like this:
Do check out 🙂
Github: https://github.com/alapanme/Robot-Framework
All Robot Framework Articles: https://testersdock.com/robot-framework-tutorial/


