In this article, we will discuss in detail how we can write user-defined keywords. User-defined Keywords help us to group test steps under a single keyword. So instead of writing multiple lines, again and again, we can just write the keyword once. This helps a lot when you have multiple test cases using the same test steps. It also helps in making the test cases clutter-free and more readable, avoid writing repetitive code, and also helps in code maintenance.
Step 1: Let’s write a simple test:
1 2 3 4 5 6 7 8 9 10 11 12 13 14 15 16 17 18 19 20 | *** Settings *** Documentation Login Functionality Library SeleniumLibrary *** Variables *** *** Test Cases *** Verify Successful Login to OrangeHRM [documentation] This test case verifies that the user is able to successfully log in to OrangeHRM [tags] Smoke Open Browser https://opensource-demo.orangehrmlive.com/ Chrome Maximize Browser Window Wait Until Element Is Visible id:txtUsername timeout=5 Input Text id:txtUsername Admin Input Password id:txtPassword admin123 Click Element id:btnLogin Element Should Be Visible id:welcome timeout=5 Close Browser *** Keywords *** |
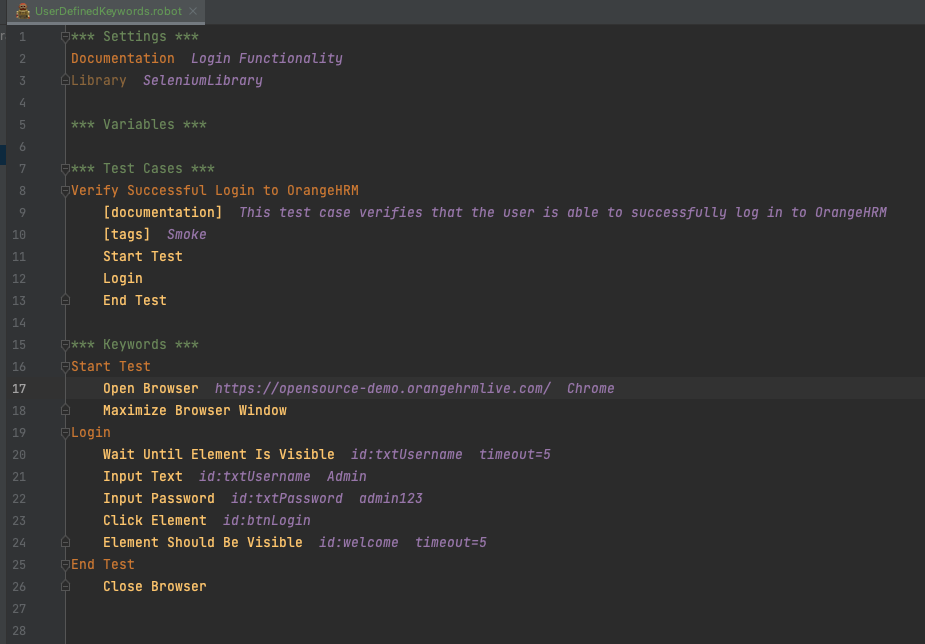
Step 2: Now we will divide the above test into three steps, meaning we will create three keywords – Start Test, Login and End Test.
1 2 3 4 5 6 7 8 9 10 11 12 13 14 15 16 17 18 19 20 21 22 23 24 25 26 | *** Settings *** Documentation Login Functionality Library SeleniumLibrary *** Variables *** *** Test Cases *** Verify Successful Login to OrangeHRM [documentation] This test case verifies that the user is able to successfully log in to OrangeHRM [tags] Smoke Start Test Login End Test *** Keywords *** Start Test Open Browser https://opensource-demo.orangehrmlive.com/ Chrome Maximize Browser Window Login Wait Until Element Is Visible id:txtUsername timeout=5 Input Text id:txtUsername Admin Input Password id:txtPassword admin123 Click Element id:btnLogin Element Should Be Visible id:welcome timeout=5 End Test Close Browser |
As you can see in the above code snippet, we have mentioned our keywords under the ‘Keywords’ section in the robot file. Then, under our keywords(Start Test, Login, End Test), we have written the relevant test steps. And then, finally in the ‘Test Cases’ section, we have just mentioned Start Test, Login & End Test.
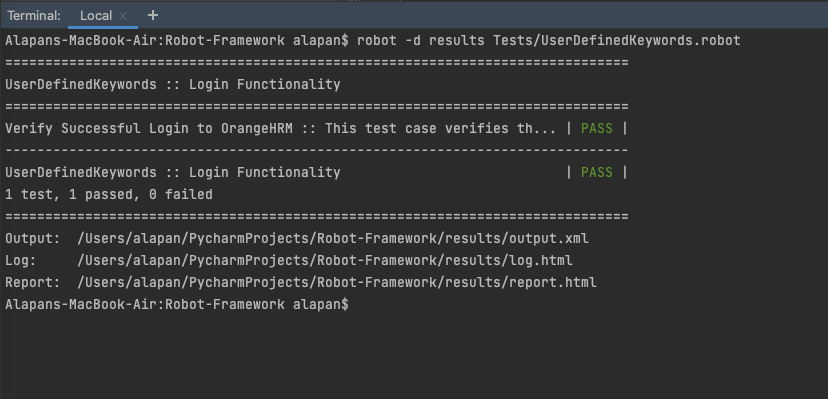
Step 3: Upon Test execution, we should see a PASS.
Do check out 🙂
Github: https://github.com/alapanme/Robot-Framework
All Robot Framework Articles: https://testersdock.com/robot-framework-tutorial/


