Selenium is a ‘buzz’ word in the testing world nowadays. Being an open-source tool has added to its aura. Out of all the selenium tools, selenium web driver is the one that has managed to get everyone’s attention. So in this article, we will be learning, how to set up Selenium web driver using Eclipse IDE. I have chosen Eclipse because it is the most widely used IDE, but you can choose any other IDE as well, like IntelliJ Idea.
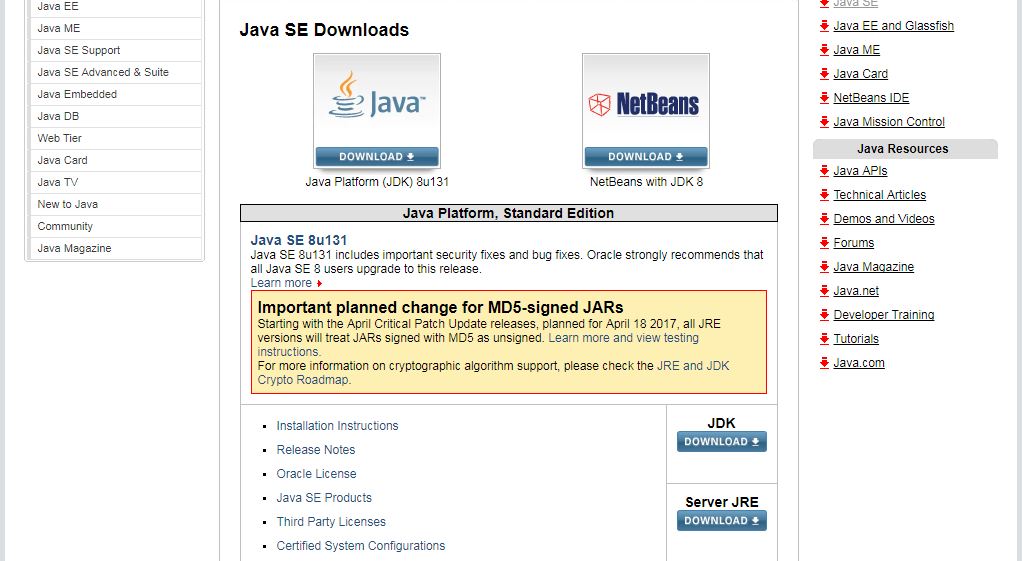
Since we would be coding the Selenium in Java, so we need to make sure that proper Java version is configured on the PC. So to install the latest Java (JDK) on your system, go to http://www.oracle.com/technetwork/java/javase/downloads/index.html and Download the latest Java SDK.
Make sure that whatever bit version Java you’re downloading whether it’s 32 bit or 64 bit, the eclipse should be of the same bit version only, otherwise it will create compatibility issues. Once Downloaded, install Java.
Next, we will be setting up the environment variables. Right click on My Computer -> Properties -> Advanced system settings -> Environment Variables. Create a user variable, JAVA_HOME by clicking on ‘New…‘ button and give the location of the Java directory as shown below.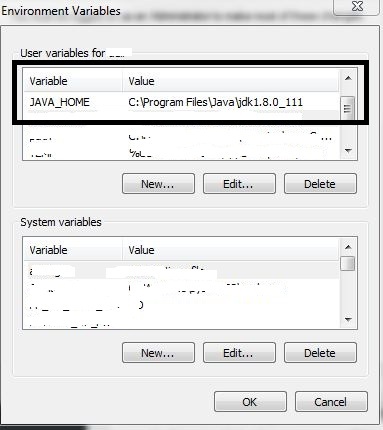
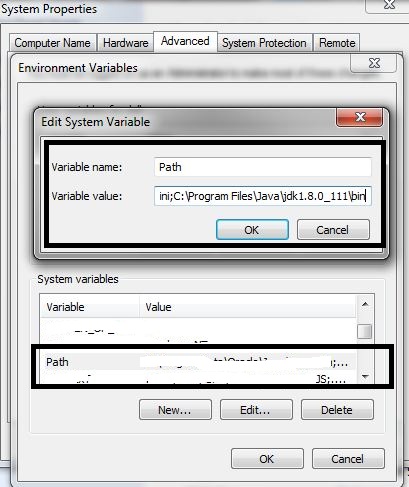
Next, is to add the Java bin path. Under system variables, find Path variable and add the bin path preceded by a semicolon (;) as shown below.
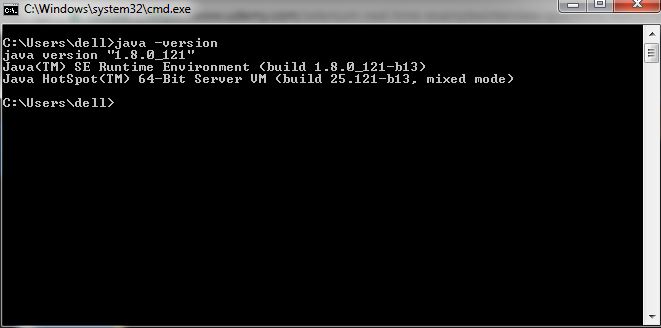
Save both the changes. To check whether the Java is getting reflected properly, go to cmd and type Java -version.
Next, we would require an IDE to write our Selenium scripts and in this tutorial, we will be using Eclipse, which is a standard IDE used by almost all IT organizations. To download Eclipse IDE for Java EE Developers go to http://www.eclipse.org/downloads/packages/eclipse-ide-java-ee-developers/marsr click on 32 or 64-bit link and save the zip. Since my Java is 64-bit, I have downloaded the 64-bit Eclipse.
Extract the zip files and double-click on the Eclipse icon to launch. Select the Default Workspace and come to the main screen where all the magic happens.
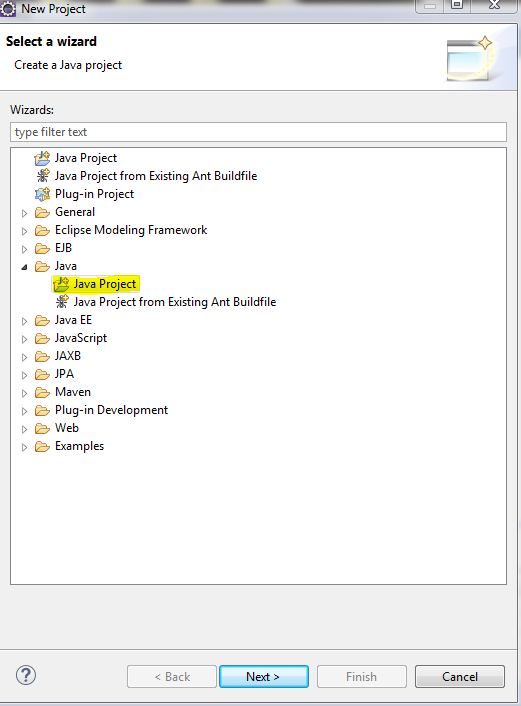
Next, we will create a Java Project. To create a Java Project, Go to File -> New -> Project -> Java Project.
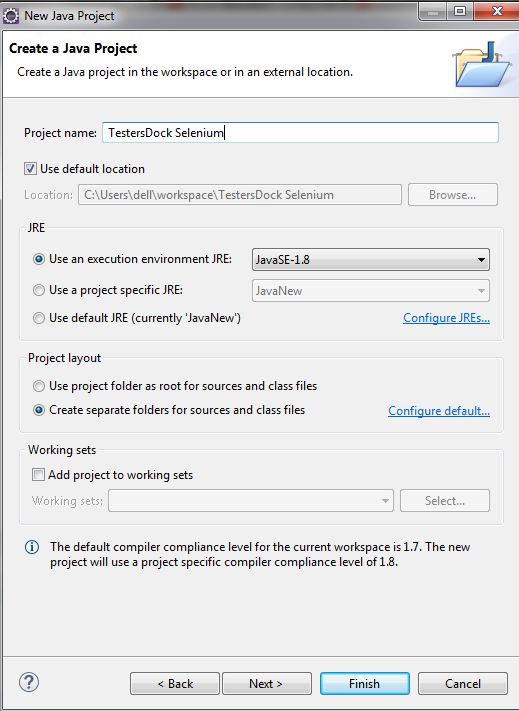
After Selecting Java Project, Click Next, give the project name, and click Finish.
Now, with selenium, everything is written in terms of Packages and Class. A package is a collection of classes. In the Class file, we will write our test cases. We will discuss the selenium structure in detail in coming lessons. The package and class file must reside under the src folder. To create a package, right-click on src -> New -> package, give it a name and save it. Similarly, for creating a class, right-click on the Package -> New -> Class, give it a name, and under ‘Which method stubs would you like to create’, select select public static void main and save it.
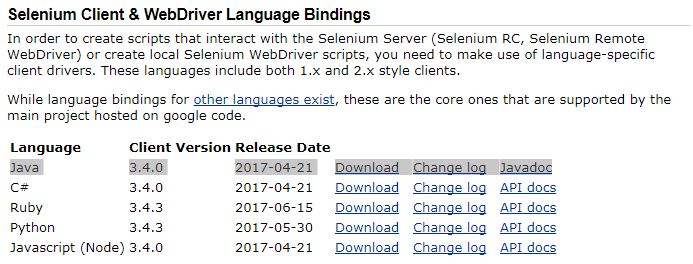
Next step is to download Selenium Jars. Go to http://docs.seleniumhq.org/download/ and download Java jars.
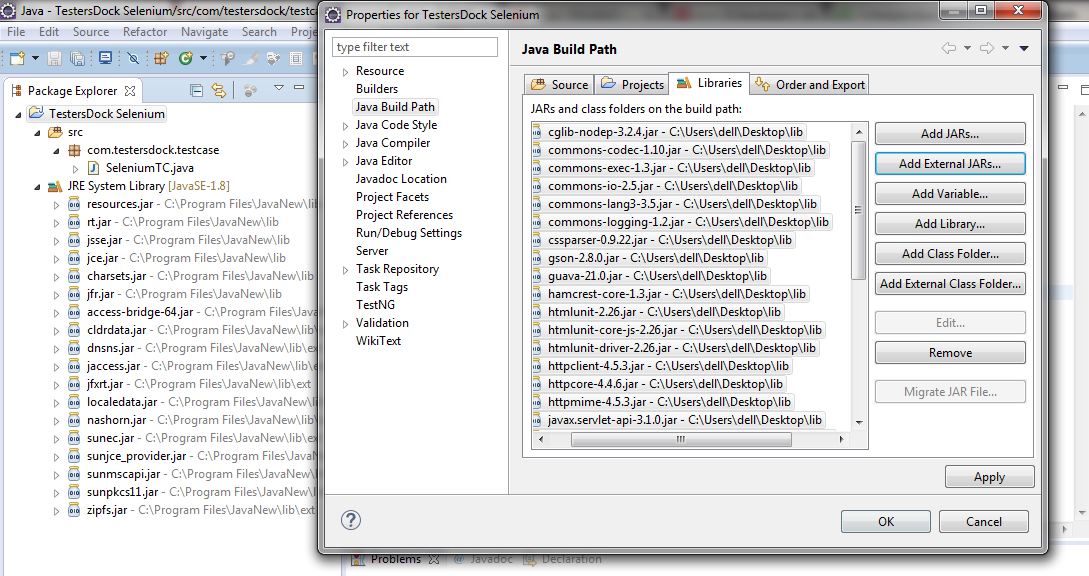
Extract all the lib folder files as well as client-combined-3.4.0-nodeps.jar to a new folder. Now import the jars into the project. Right-click on the Project -> Properties -> Java Build Path -> Libraries -> Add External Jars.
Click on Apply and then OK. If the Jars are successfully imported, you can see them under Referenced Libraries.
That’s it, we have successfully installed selenium. In the next chapter, we will learn to write our first Selenium script.





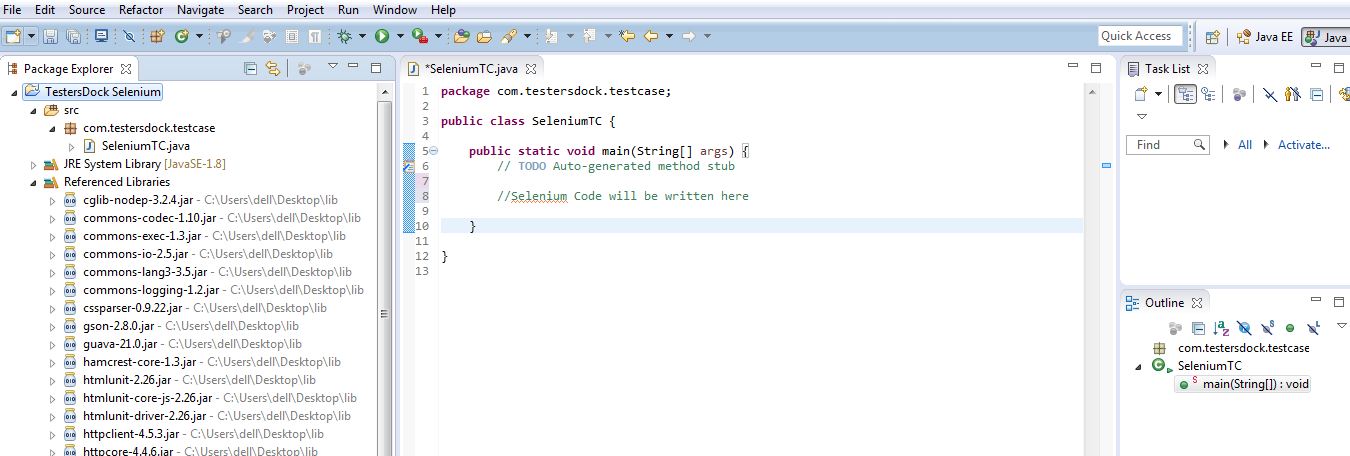


Ohh yeah, selenium web driver is working on my computer system and also successfully created a variable from the environment.